New Service Manager for Exchange 2016 – Explained!
The full migration to Exchange 2016 has proved to be extremely challenging, but with much success we are managing to move ALL of our clients hosted with us to the new platform.
New changes have occurred to our Service Manager to best compliment the new migration. Below, you’ll find explanations and screenshots of what you’ll be seeing from now on.
You can access your service manager inside our support portal via support.ownwebnow.com
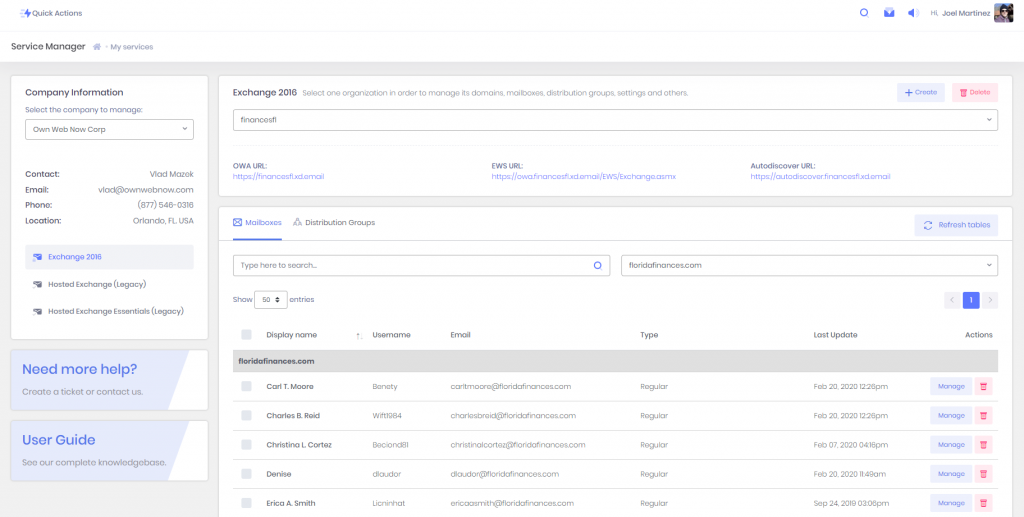
- Clients must select the organization they would like to manage
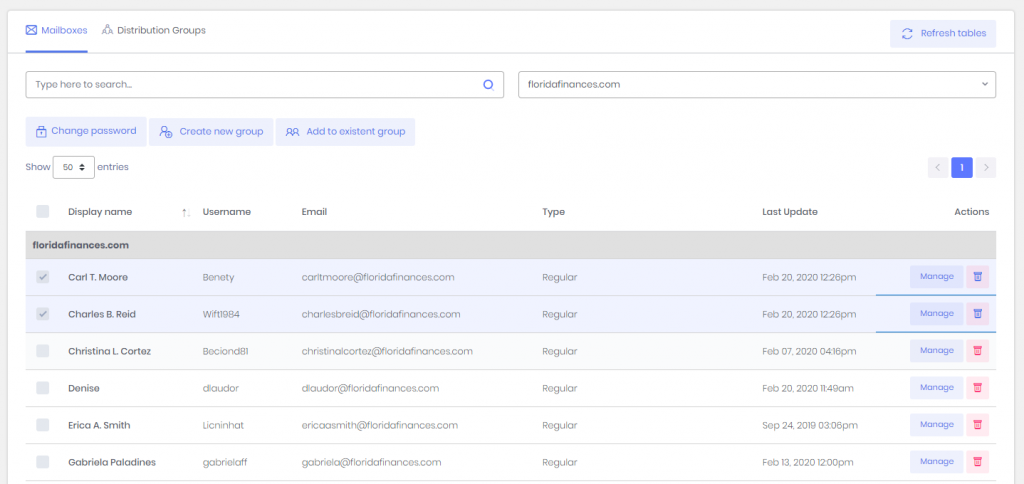
- Once they select the organization, the list with all the domains mailboxes and distribution groups under that organization will be updated below
- It is possible to search for specific accounts or filter by domain

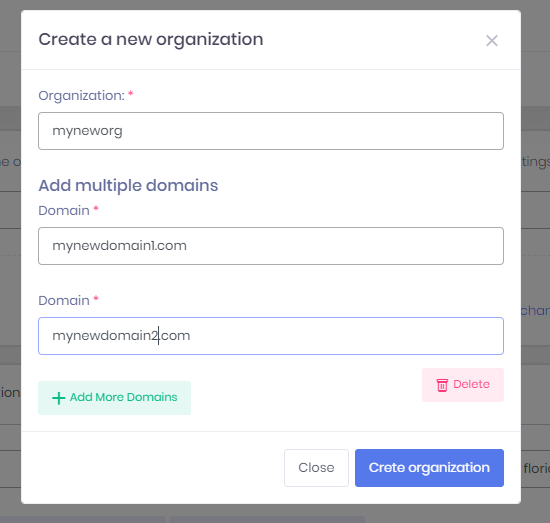
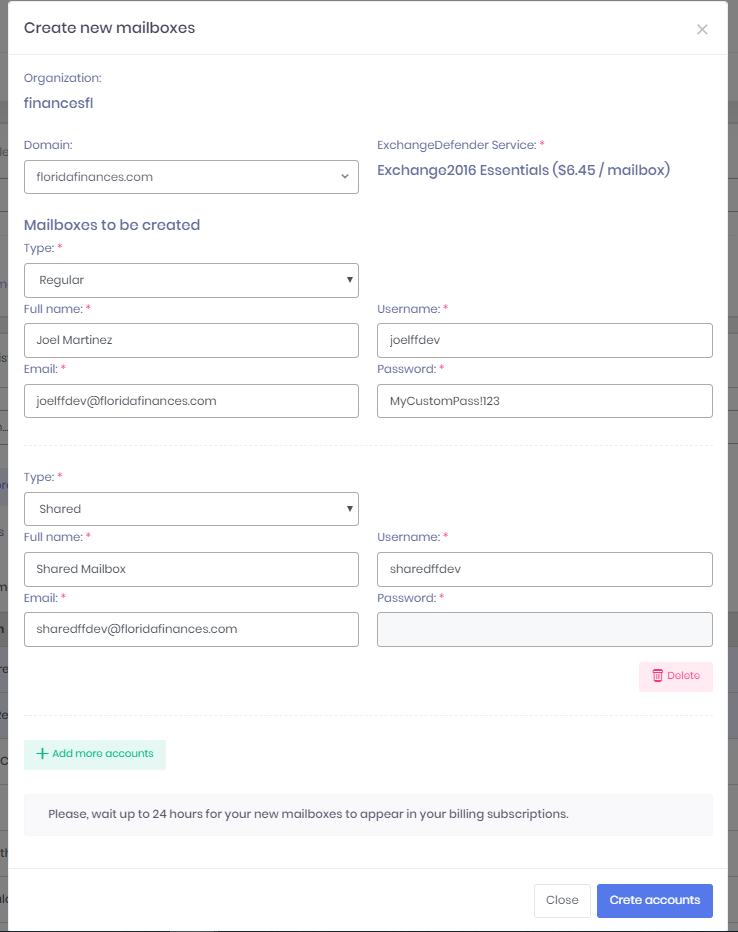
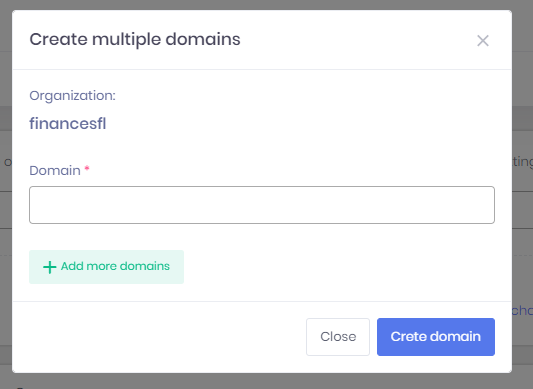
If you click the + Create button, a list with options will be displayed:
- New organization
- New mailbox
- New domain
If you click on create organization, a pop-up window will be displayed where you would have to type the name of the organization and add as many domains as they need at once.
If you click on new mailbox, a pop-up window will be displayed where you would have to select the domain and then type all the information for each one of the mailboxes.
Updates are as followed:
- The list of accounts is now grouping the records by domain, and sorting them by the display name in ascending order, that way it makes it easier to find accounts when you have a lot.
- From there you can change the password of multiple accounts at a time, create a distribution group based on your selection or add the accounts selected to existing distribution groups
- You can also delete accounts
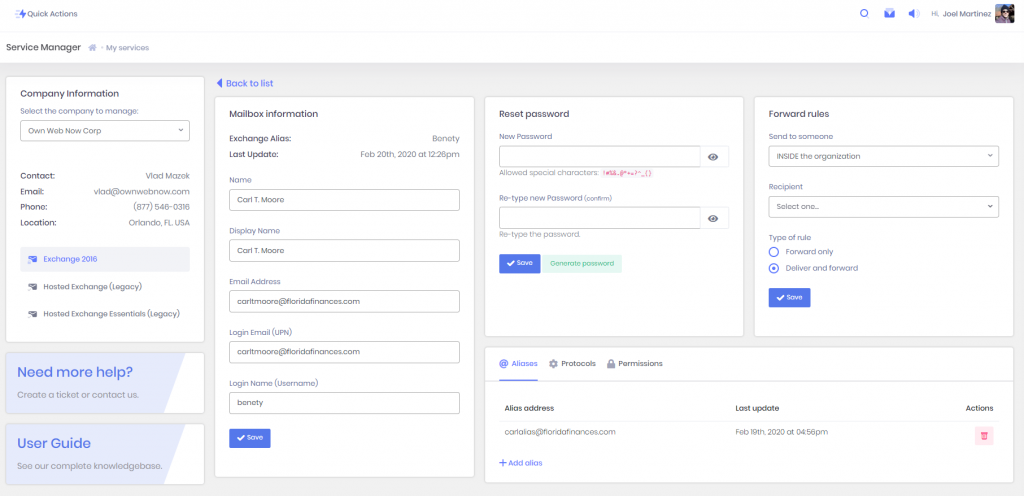
If you click on Manage, another view will be displayed with the information of the account selected. From there they can:
- Update the information of their account
- Reset their password
- Create a forward rule
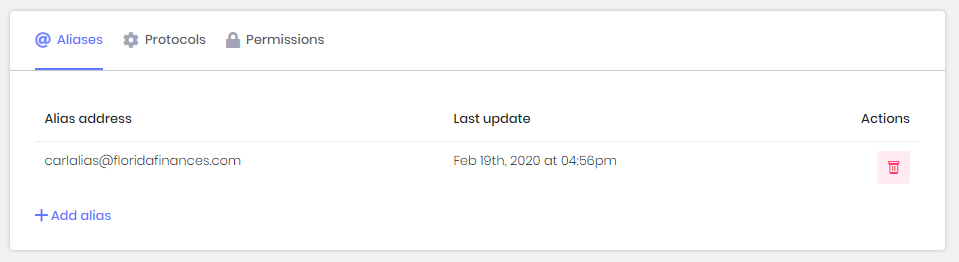
- Add aliases
- Configure their protocols
- Add permission rules
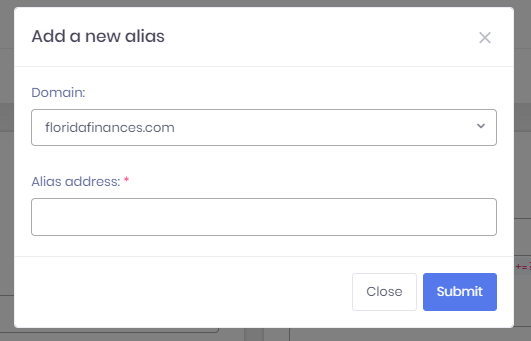
From there, if they want to create new aliases they just have to click on the button +Add alias
To add an alias they will have to pick a domain, and type the local part of the email (local part of the email is everything before the @) and the alias automatically will be displayed in the table .
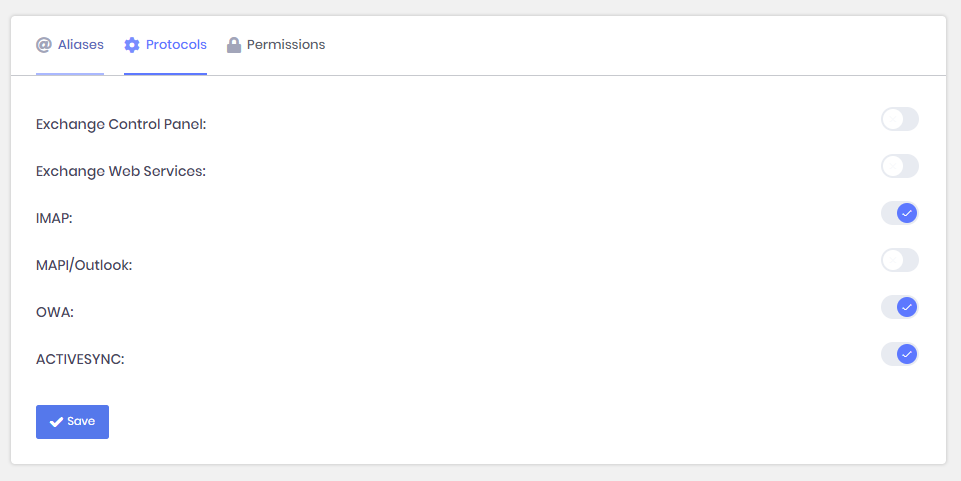
To update their protocols they just have to click on the switches to turn them on/off and click on save.
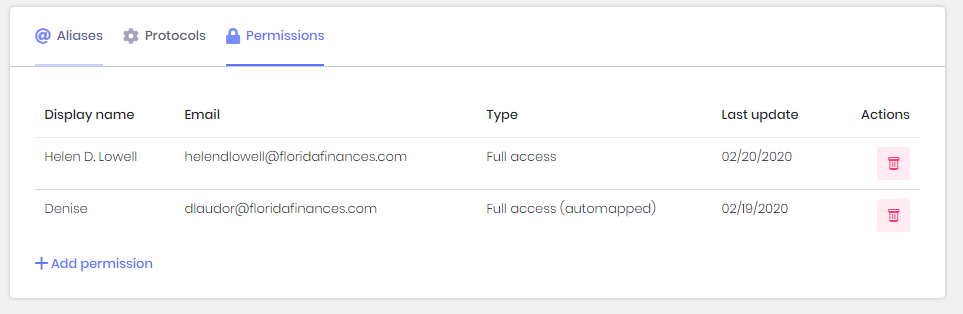
The permissions work pretty much the same way as aliases, with the exception that you have more options.
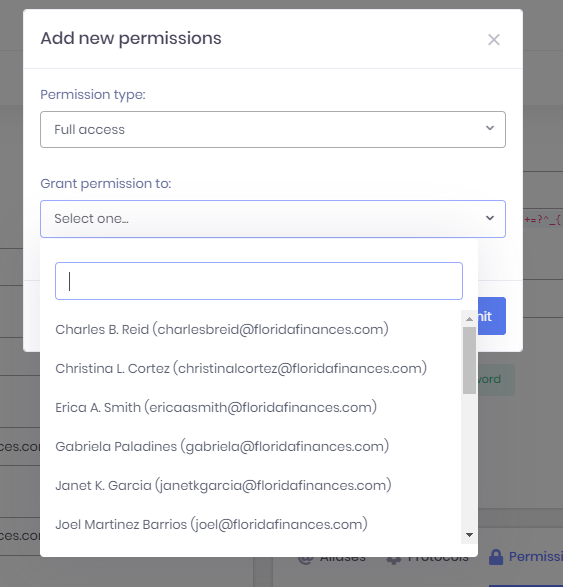
To add permissions, you must select the type of the permissions you would like to grant and the account (only accounts under your organization will be displayed that do not have a permission rule created for the same mailbox, that way there are no repeated permission rules for the same pair of mailboxes)
IMPORTANT CHANGES THAT COULD AFFECT THE USER’S EXPERIENCE:
- In Hosted Legacy, you could create Distribution Groups with no members and add the members later. In Exchange 2016, there cannot be empty Distribution Groups, so the only way to create groups now is checking the boxes of multiple accounts (mailboxes), and clicking on the button “Create new group”.
- In Hosted Legacy, there were no such thing as an “Organization”, in Exchange 2016 organizations were implemented to give our MSPs a way to group different entities like Domains, Mailboxes, Distribution Groups, etc under the same “Client’s structure” (organization), that way it will be for them to manage their clients since they have everything for each one of them in the same place.
- In Exchange 2016 you can create three types of mailboxes: Regular, Shared or Room (an explanation of each will be provided later).