ExchangeDefender Exchange Setup
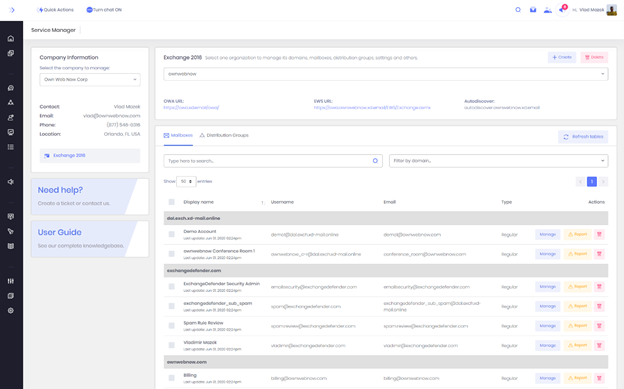
This guide is intended for IT solution providers, CIO, and technical staff that is in charge of setting up and managing email. While Exchange is a very complex and robust environment, our control panel is designed to help personnel of all technical skill levels manage email. In Figure 1 above you can see our Service Manager, the user friendly way to manage every aspect of email in your Exchange organization.
This site is accessible at https://support.ownwebnow.com and your MSP/CIO has access to manage the Service Manager on demand. For the purposes of this guide, we only reference this site because it is where management begins: the rest of the guide is to help every user configure their Microsoft Outlook, or mobile Android / iOS devices.
Important Server Names
Microsoft Outlook, iOS and Android devices connect to the Microsoft Exchange infrastructure through several web services. If your IT provider has configured your Autodiscover DNS properly, you will never need to know about these sites, but it is important to know where the resources are in the event that you need to configure something more complex to work with Exchange. Figure 2.
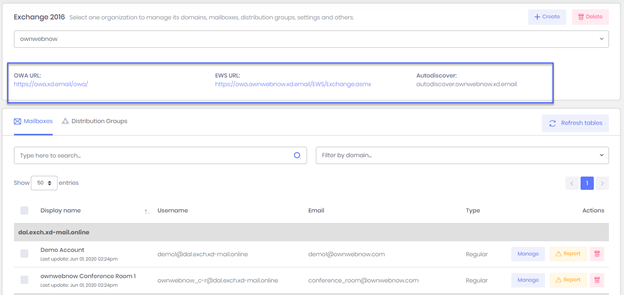
Each Exchange organization managed by ExchangeDefender has their own branded set of OWA, EWS, and Autodiscover records. While we recommend you use the branded one for your organization, the default ones will work the same way and they all point to the same network resources.
Outlook Web App
https://owa.xd.email/owa/
Outlook Web App (formerly known as Outlook Web Access) is the web version of Outlook that works in your browser. While not as powerful or as flexible as Outlook, unless you are a power user, it will do the job. You can point your cell phone, tablet, laptop, or workstation to the URL above and it will give you access to the most popular Outlook features over the web.
EWS URL
https://owa.ownwebnow.xd.email/EWS/Exchange.asmx
Exchange Web Services (EWS) is the web service endpoint for advanced configurations. If you need to integrate a service or a device with Exchange Web Services, this is the URL to use. As of Exchange 2013, there is no support MAPI.
Autodiscover
autodiscover.xd.email
Exchange Autodiscover service makes it easy to deploy Outlook without providing manual configuration parameters – all you need is your email address and your password. Since 2013, Autodiscover has become the only way to configure Outlook/Exchange and manual configuration is no longer possible. If you do not have Autodiscover record in your DNS you need to create it and point it as a CNAME to autodiscover.xd.email (if this is not possible for some reason, see Appendix A)
ExchangeDefender Admin Control Panel
https://admin.exchangedefender.com
Managing ExchangeDefender security, including the included Exchange antispam, antiphishing, and business continuity services, is done through our admin control panel. Most organizations are managed through the domain login (domain.com) or user login (user@domain.com). Please see https://www.exchangedefender.com/docs for more information on how to manage this powerful service.
ExchangeDefender Next Generation LiveArchive (NGE)
https://nge.exchangedefender.com
ExchangeDefender LiveArchive is a business continuity (email resilience) platform independent of Microsoft Exchange that is running in parallel with your email infrastructure. When Microsoft Exchange experiences a technical problem, you can still send and receive email from any device using the same email and password that you use for Outlook and OWA. Please see https://www.exchangedefender.com/docs for more information.
Configuring Outlook
For the purposes of this guide, we are assuming that your IT personnel has already created all the required DNS records (MX, SPF, DKIM, and most importantly, Autodiscover) and that you know your login credentials (you can test them by going to https://owa.xd.email/owa/)
Step 1: Download and run Outlook Registry Tools
Open your web browser and go to the following site: https://www.exchangedefender.com/media/autodiscoverregistryhacks.zip
Step 2: Open the Outlook Registry Tools
Click on autodiscoverregistryhacks.zip to open the archive (Figure 3):
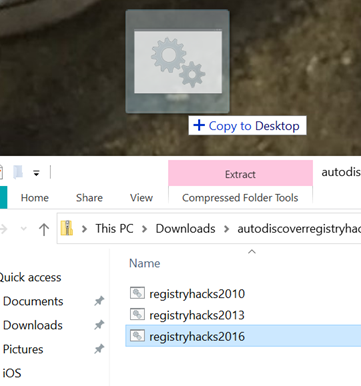
Figure 3: Batch files for Outlook registry entries
Find the version of Outlook you have (registryhacks2016 will work for both Outlook 2016 and 2019) and drag it to the desktop.
Click on Start, type cmd, and then right click on the Command Prompt.
Click on Run as administrator.
Change directory to your desktop: cd C:\Users\YourUsername\Desktop\
Note: Please substitute your username for YourUsername in the path. My example is C:\Users\Vlad\Desktop\
Run the batch file you extracted and moved to your desktop in the previous step. If you do it right, this is the output you will see (Figure 4):
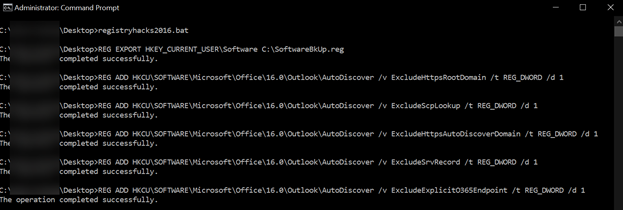
Figure 4: Registry entries being added
IMPORTANT: Reboot your PC.
Step 4: Outlook Configuration
Start Microsoft Outlook and your configuration wizard will start. This process can take a few minutes for each step to be complete, if you’re waiting more than 10 minutes something is likely not done correctly.
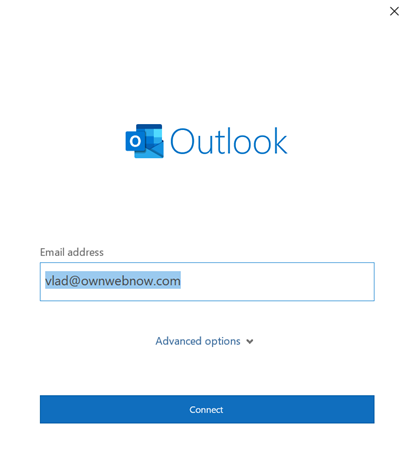
Figure 5: Outlook Welcome
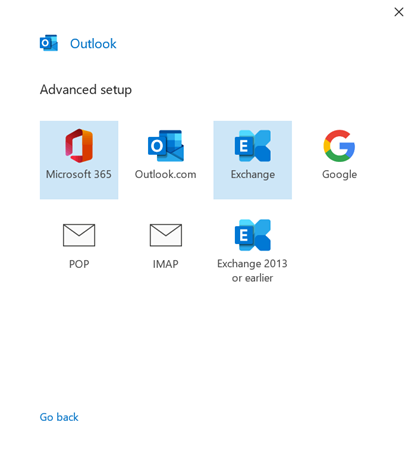
Select Exchange.
Your system will now contact the Autodiscover web service to obtain all the Microsoft Outlook configuration credentials. If it worked, you will be prompted to accept server settings:
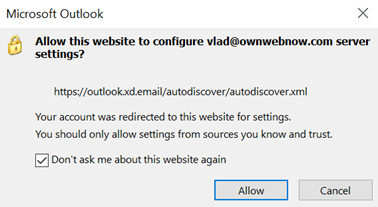
Next you will have to provide your password.
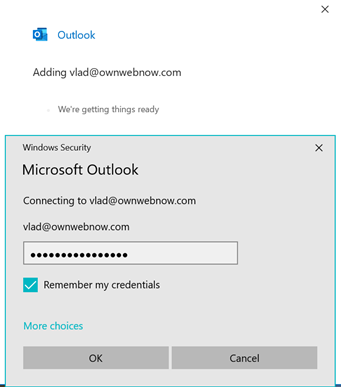
Microsoft Outlook will now authenticate with our servers and configure everything for you. Next you should see the notification that Account successfully added.
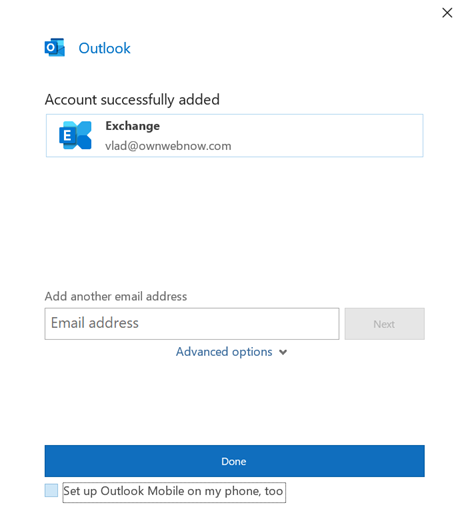
Click on the link on the bottom under Done and confirm that checkbox is not checked next to Set up Outlook Mobile on my phone, too. Figure:
That is all! You are set and ready to go. Microsoft Outlook will now continue to set everything up and in a few moments.
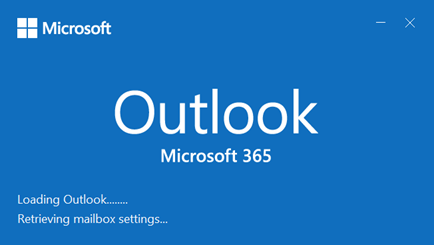
That is all, enjoy Microsoft Outlook powered by ExchangeDefender managed Exchange.
Managing Calendar Permissions
Designed for Outlook 2013/2016
Select the Calendar button in the Navigation Bar.
Select the calendar that you would like to share, right-click on the Calendar and choose Share > Calendar Permissions.
On the Permissions tab, you may add or remove users to whom you have delegated access to your calendar.
To add a new delegate, select Add… and search for the desired user by Last Name. You can search the Global Address List or your personal contacts list by selecting the appropriate dropdown menu under Address Book. Under the Permissions heading, choose the level of detail you would like to provide to the user.
To remove a delegate, select the user and choose Remove.
Choose Apply > OK.
Configuring iOS Devices (iPhone, iPad)
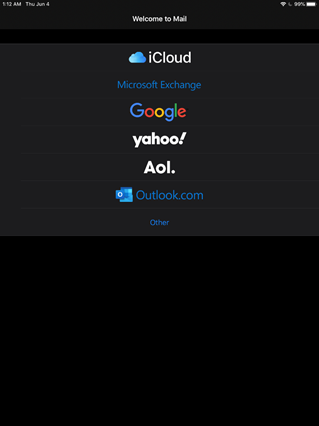
Configuring iOS Devices is very simple. Just start your Mail app and you will be prompted to setup a new account. Select Microsoft Exchange, second option from the top.
Next, you will be prompted for your account credentials. Your login credentials are the same as for Outlook Web Access.
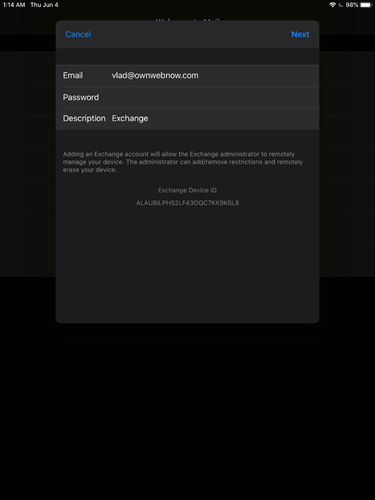
Tap on Next.
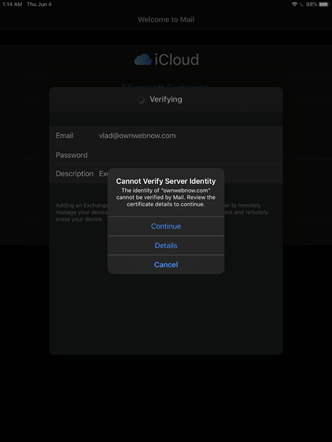
Your device will now attempt to locate the Autodiscover server and obtain all the settings.
You will be prompted to verify server identity, tap on Continue.
Next, you will be prompted to provide the server and login credentials, same as in the previous screen.
Server for iOS is owa.xd.email
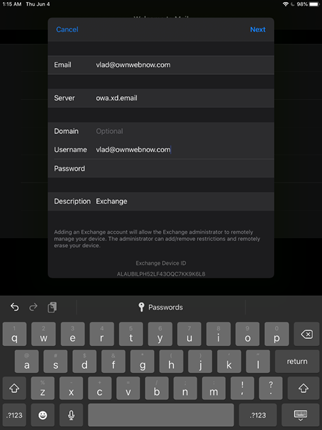
Tap on Next.
After a few minutes the device will autoconfigure and allow you to select which iOS applications should sync data with the Exchange server.
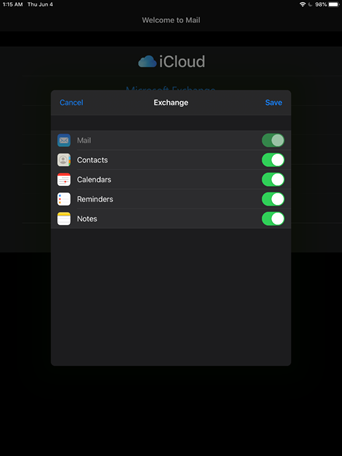
Make your selection and tap Save.
Android Setup
Android setup is very similar to iOS but most vendors use their own email app. If you choose to use the stock Android Gmail app, or other Android phone vendor email app, you will need to know your:
Server address: owa.xd.email
Username & password which are the same as the ones you use to login to https://owa.xd.email/owa/
Configuring MacOS X with ExchangeDefender Exchange
The following instructions are for MacOS Catalina, and the instructions work very similarly for all other versions of MacOS X. So long as you have your Autodiscover record configured properly, your setup process will just require your email address, password, and a few clicks along the way.
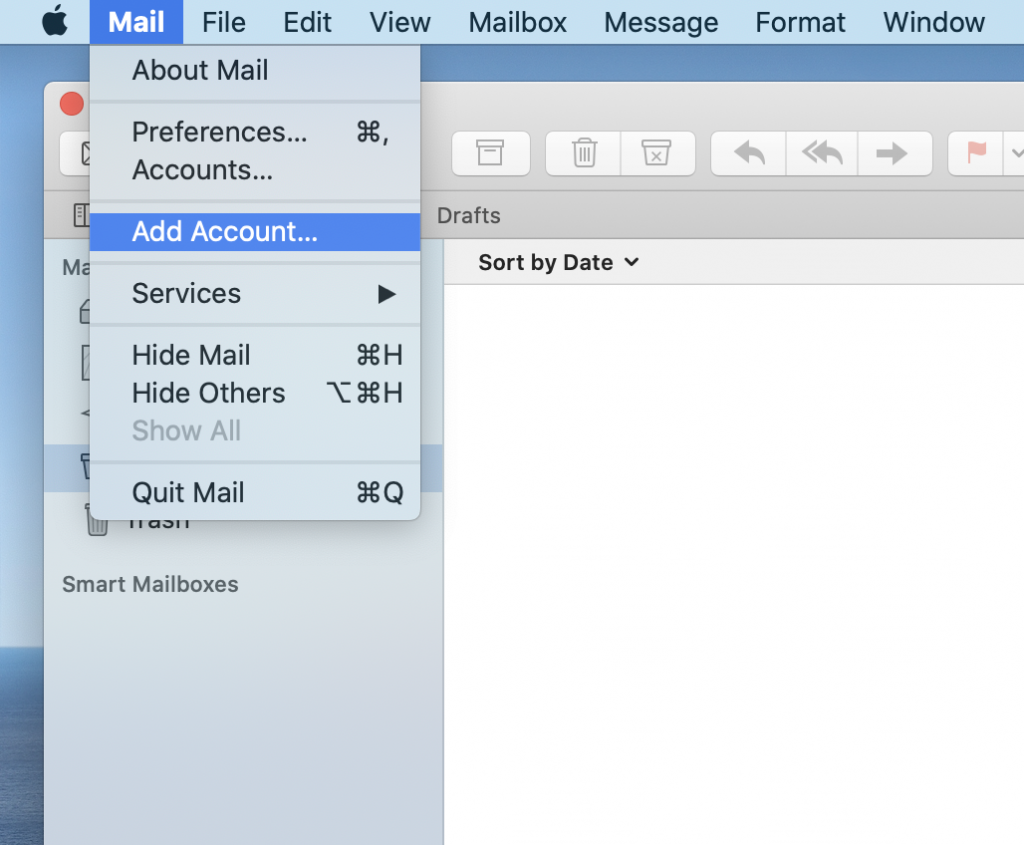
1.First, start the MacOS Mail app. If you aren’t prompted to add an account click on Mail > Add Account
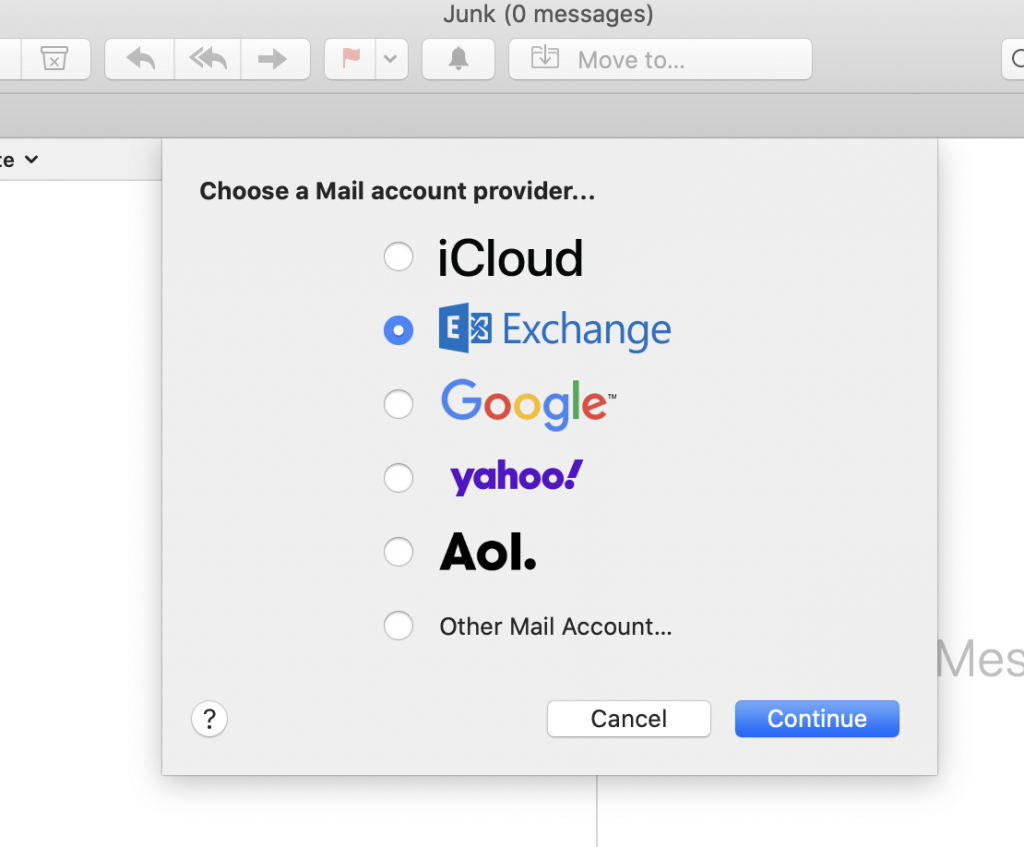
2. Select Exchange from the “Choose a Mail account provider…” screen. Click Continue.
3. You will now be prompted for your name and email address. Type them in and click Continue.
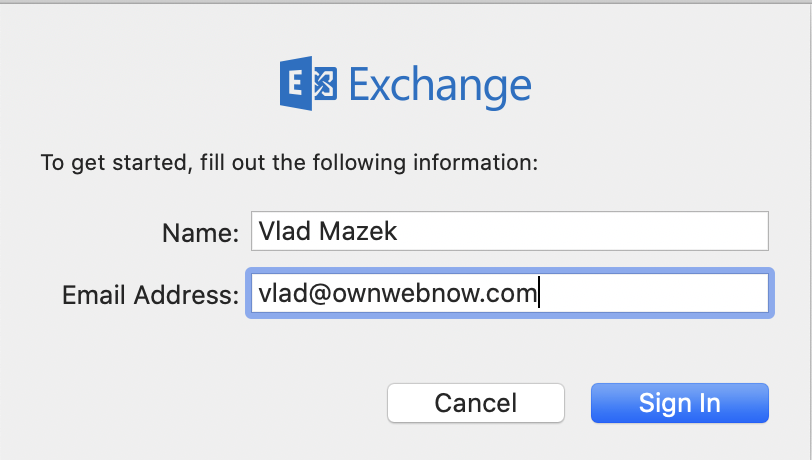
4. This is where Autodiscover kicks in. Manual setup is not supported. Click on Sign In.

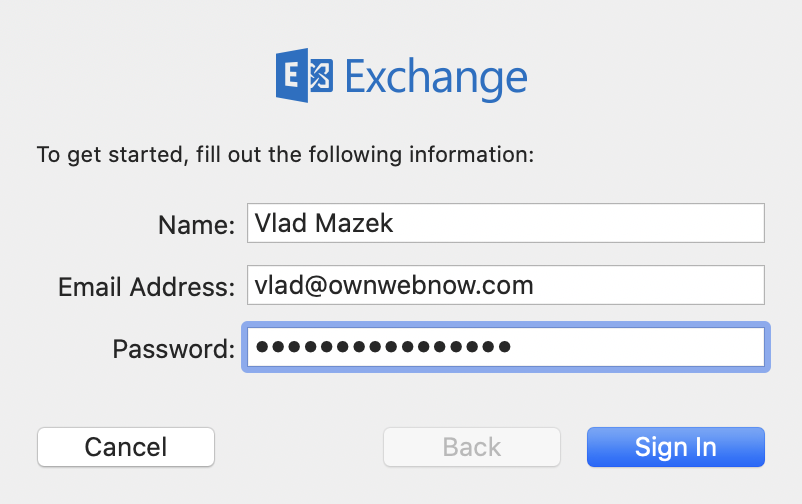
5. Type in your ExchangeDefender password and click on Sign In.
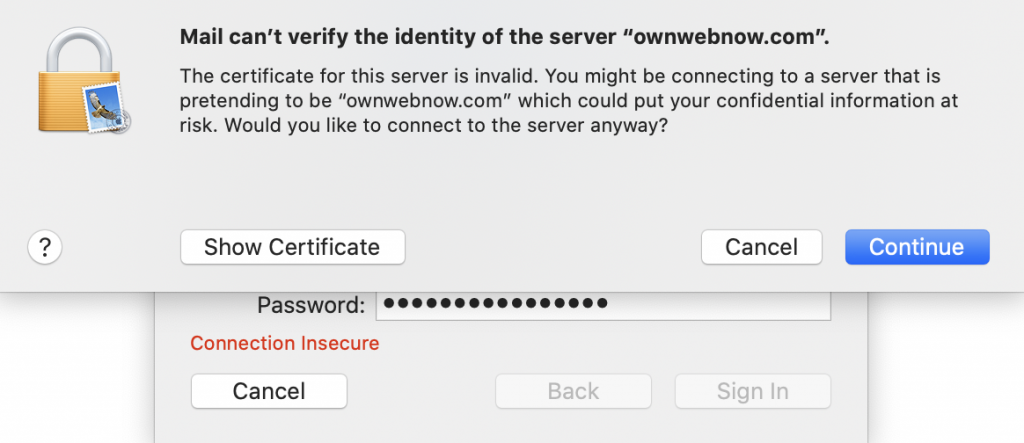
6. You will be prompted to accept an SSL certificate. Click on Continue.
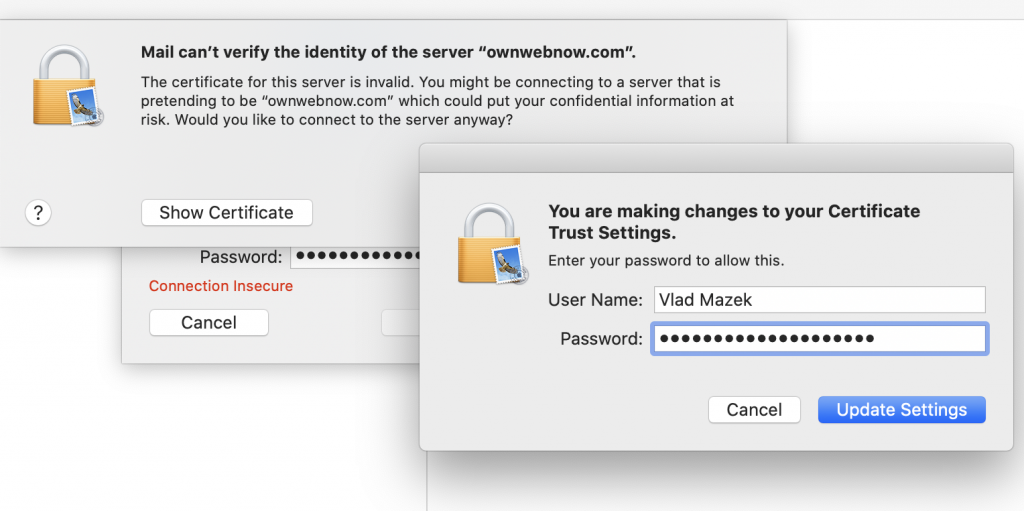
7. You will now be prompted to add the certificate. Please type in your MacOS X password here. Click on Update Settings.
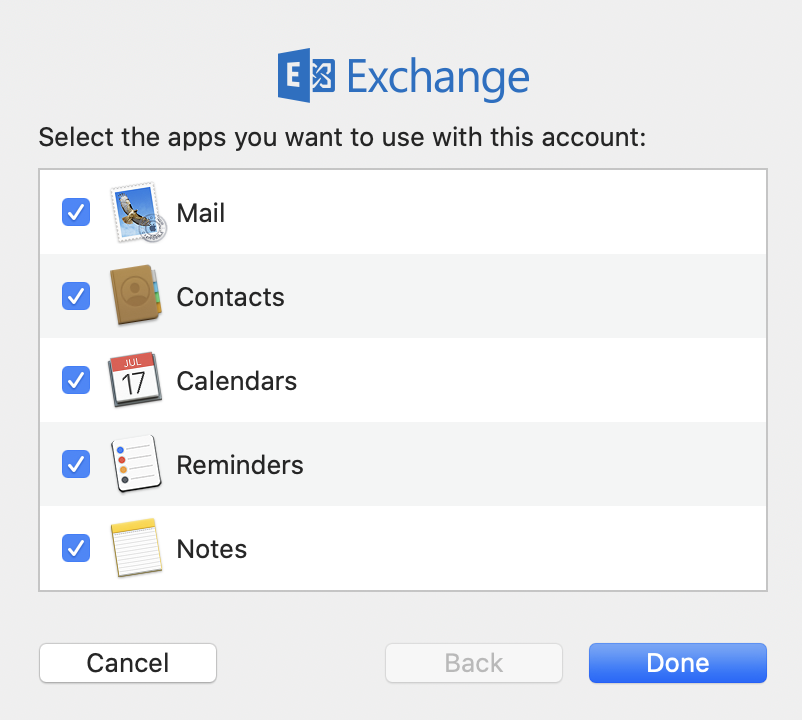
8. You will now be prompted which apps you want to have access and sync with your Exchange data. Make an appropriate selections and click Done.
Congratulations, you’re all set. Exchange will now sync with your MacOS. If you need to make changes, you can always click on Mail > Accounts and go from there.
If the process fails for any reason, make sure you have an Autodiscover record set and pointed to the right direction. Make sure you are using the right credentials, you can test them at https://owa.xd.email/owa/ and if they work there, they should work on your Mac.
Appendix A: Hacking Autodiscover
As of Microsoft Exchange 2013 and Outlook 2013, you have to use Autodiscover records to configure Outlook. Your domain administrator must create an Autodiscover record in your domain.
Hostname: Autodiscover
Host Type: CNAME
Host value: Autodiscover.xd.email
After the host is created, it can take up to 72 hours for the DNS change to propagate (most should propagate in minutes).
If you cannot modify your DNS, you can hack it by using the Windows Hosts File. This is not recommended nor supported by ExchangeDefender and will likely be blocked by your antivirus, but if you’re technically sophisticated and can troubleshoot DNS you can point the Autodiscover.yourdomain.com hostname to the IP address of Autodiscover.xd.email. This is a temporary measure only, if you cannot immediately create a DNS record in your domain, and is not supported by our team.